Noticing the Signs: When to Swap the Idle Air Control Valve


A idle air control valve is vital in maintaining the stable performance of your automobile's motor. It controls the amount of oxygen that goes around the throttle body, ensuring that the motor keeps an ideal idle rate regardless of numerous conditions, such as engine temperature or load. When this component breaks, it can lead to a variety of issues that affect the functionality and operation of your automobile.
Understanding when to swap the idle air control valve can prevent you from greater difficulties down the road. Signs of a failing valve can often be subtle at first, but they tend to intensify if left unaddressed. Common symptoms are unsteady idle rates, shutting down, or trouble igniting the engine. Recognizing these indications is essential for any automobile owner who wants to ensure their engine functioning well and optimally.
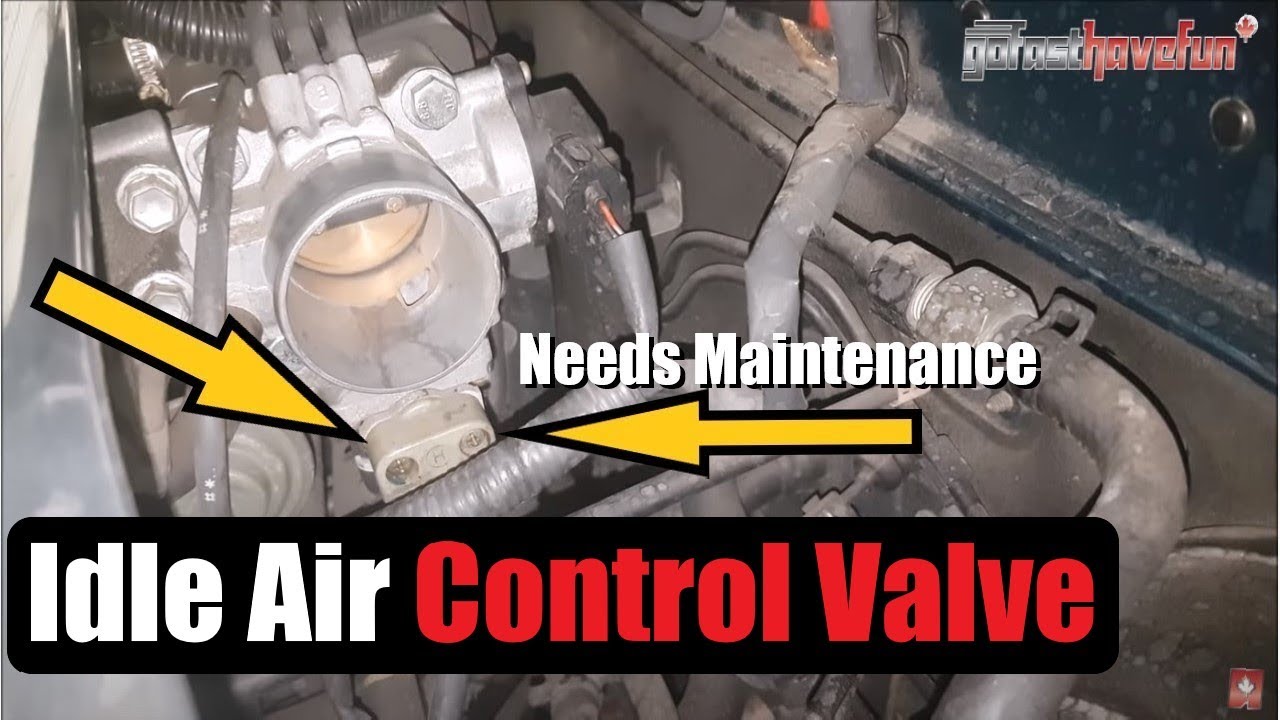
Comprehending the Stationary Atmospheric Control Controller
The stationary air regulation valve, also called the idle valve, plays a critical role in regulating your vehicle's engine idle speed. It is responsible for the volume of air that bypasses the throttle body, ensuring that the engine receives the ideal amount of air required at at rest. By controlling the flow of air, the IAC valve helps maintain a consistent and effective idle, which is essential for overall vehicle performance.
When the engine is facing varied loads or conditions, the IAC valve modifies the flow of air to ensure the engine running smoothly. For case in point, when the AC is engaged or when additional accessories are engaged, the IAC valve compensates by permitting more air into the engine. This task is vital to prevent engine stalling and to ensure that the vehicle operates correctly in different driving conditions.
A faulty idle air control valve can lead to numerous issues like jerky idling, engine stalling, and poor throttle response. Typical signs of a malfunctioning IAC valve are fluctuating idle speeds or an failure to maintain a consistent idling position. Recognizing these signs early can assist prevent more extensive engine problems and maintain the general well-being of your vehicle.
Common Signs of a Malfunctioning IAC Valve
A common sign of a defective idle air control valve is irregular idling. When the IAC valve is not functioning correctly, your engine may experience oscillations in RPMs when at a stop. This can present as a bouncing tachometer or an engine that feels like it is having difficulty to maintain a smooth idle. If you notice that your vehicle's idle speed is variable, it is a sign that the IAC valve may need attention.
Another evident sign of an issue with the IAC valve is engine stalling. If the valve fails to regulate the air intake properly, it can lead to the engine stalling, especially when coming to a stop or during slow maneuvers. Stalling can be particularly concerning as it poses a danger, as the vehicle may suddenly lose power.
Finally, bad fuel economy is another signal that the idle air control valve may be malfunctioning. If the IAC valve does not allow the sufficient amount of air to enter the engine, it can result in an poor combustion process. This problem can cause the engine to use more fuel than expected, leading to noticeably reduced gas mileage. If you notice you are filling up more regularly, it may be worth investigating the condition of your IAC valve.
Substituting Process and Recommendations
Substituting the IAC valve can be a straightforward task if you handle it in an organized manner. First, ensure that your engine is at a safe temperature and remove the battery to avoid any electrical issues. Find the idle air control valve, which is typically found next to the throttle body. Remove any connectors and screws that fasten the valve in place. With caution take out the old valve, noting how it is mounted for proper alignment of the new one.
Before putting in the new idle air control valve , it's important to clean the mounting surface to stop any debris from impacting its operation. Also, inspect the electrical connectors for corrosion or deterioration, as these can lead to intermittent faults. Once everything is set, position the new valve correctly and attach it with screws. Reconnect the electrical connectors, ensuring they are firm and free of dirt or corrosion.
After installation, reconnect the battery and turn on the engine to ensure proper functioning. Observe the idle and listen for any unusual sounds. It may also be helpful to use a diagnostic scanner to erase any trouble codes and verify that the new valve is functioning properly. Be sure to refer to your vehicle’s manual for any specific procedures or load values needed for your model.